Showing posts with label Christmas. Show all posts

Sunday, December 21, 2014

Yet another use for the mini cupcake box - Christmas cake pops!

Hey all! As promised here is another way to gift the mini cupcake box from the previous post. Here, I just used acetate for the top and some fun paper for the bottom,


filled with cake pops, 


wrapped with a bow, and done! 


Well, except for the cake part pop. That took a little more effort. :)

The candy cane cake pop was super easy, and is my favorite to eat...

The hot cocoa cake pop was another fun one. 
(just make the mug handle and marshmallows out of white candy melts)


And are those lumps of coal? I worried about giving these away because 
of what it might suggest to those I gave it to...


The snowman was just a white cake pop with edible marker drawn on.

Pretty fun to make and give away.

In case you didn't get the file last time, here is the version without the opening at the top. I've also included a wrap to go around the box in case you want to use that instead of a ribbon.


Merry Christmas!!!

Sunday, December 18, 2011

Christmas Neighbor Goodie Bags

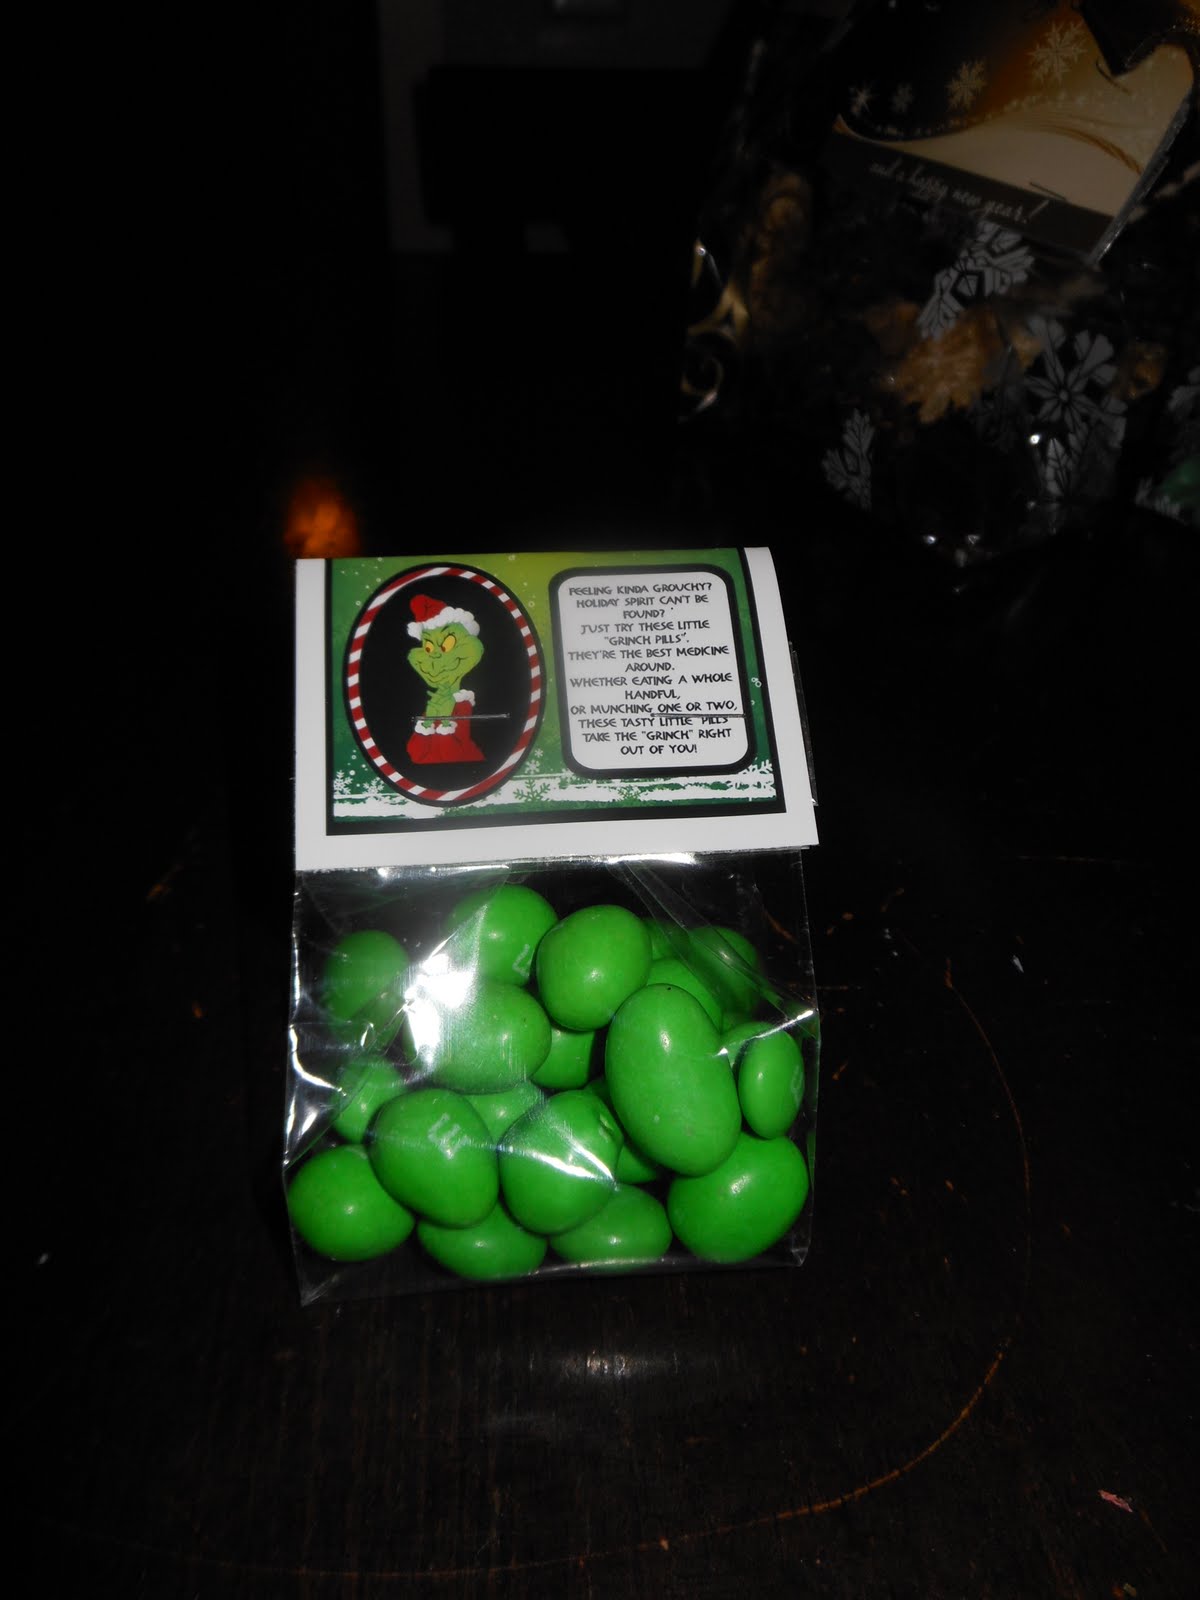
Every year for Christmas, I get together with my sister-in-law to make goodies to give away to our friends/neighbors. This year I was a bit behind in my planning and preparation for that day and I was getting just a little stressed out, but once again, my sisters Mindy and Michelle came to my rescue! (as always). Mindy gave me a really fun gift basket with all kinds of chocolates and molds inside as well as pretzels and lollipop sticks. Cute and delicious goodies...check! Michelle had previously shown me some little cellophane bag toppers she made that were printed as photos (they are at the bottom of this post). Cute way to present goodies...check!
And here it is! I created a picture in inkscape with a free Christmas background I found online and added some text and colored box shapes. Then of course I sent it to Michelle who promptly fixed it and changed my png to a jpg for me. She really made it turn out beautiful and it was such a fast way to get 20 cello bags done!

These are the ones Michelle made...so cute!

Grinch Pills:
Rudolph Spares:

Reindeer Poop with Whoppers and dollar store scoop:

Sunday, December 19, 2010

Last Minute Christmas Gifts

Need some last minute gifts for friends, neighbors, family? Try a few of these on...

I love this plate above. My sister Michelle designed it. It's such a beautiful holiday decoration with a wonderful saying to bring the Spirit of Christmas to your home. Although I've categorized this in with the gifts, I'm keeping mine! The plate was only $2.50 at Tai Pan Trading. The font is Civitype.
This is another Michelle design. Such a fun, cute idea for families with little children. I'll be keeping one of these as well! The font is Disney and the cut file for the Santa head, well, is Michelle's. Maybe she'll share? But of course you can put in any Christmas doodlebat.

I really like this gift above for couples, teachers, neighbors, etc. Really, any woman would be happy to get one of these! Including myself...you guessed it. I'll be keeping one of these as well. I can't help it - I'm a selfish being! This is a Mindy idea. The tag on these are going to say, "You're gettin' muffin for Christmas!" Inside are some spatulas and I'll be putting in muffin mixes as well. So cute! Thanks Mindy! Here is the cut file for the trees.
Christmas tree cut file - .svg

I wish I had taken a picture of the advent calendar. I haven't finished mine yet, but Mindy and Michelle made such cute ones. I'm going to try to find the paper I want so it fits with my decor. I'll show you when it's all done!
Good luck with your last minute gifting!

Tuesday, December 14, 2010

Merry Christmas and Little Give Away

Merry Christmas everyone!
For the holidays, I'd like to do a couple things...first - offer you a new box cut file for your Ritz and sugar cookies! If you make this file as big as a 12 x 12 paper will allow, you will be able to fit exactly four of each kind of cookie inside, just right.


Wrap it up with a 1 1/2" - 2" ribbon and put a tag on it. Oh...another merry christmas to you...I've provided the tag I made in word with a cut file to go with it so you can edit, print, then cut. Hooray! Easy as that! The fonts used are Freebooter script (free) and DB Seasons Greetings (could be free...see below! - otherwise, found at scrapnfonts.com).

For my last little surprise, I'd like to give away a couple of great fonts I bought two of at scrapnfonts.com. So, leave a comment by Friday night at midnight and I'll random number in Excel to see who will win the following fonts:
DB Seasons Greetings (used for the tree on the labels)
LD Cursive Flourish

I know it's not a big thing...but, hey! It's free!!! (and I can afford to do it!) So leave a comment and see if you win!
Files:

Sunday, December 12, 2010

Sweet Christmas Treats

Hi there! We've been busy over here creating some goodies to give out to neighbors - I'm sure we're not the only ones either! Stress city is almost over - I can't believe how much work making goodies is. Thank goodness for awesome helpers! Thanks Jen, Sarah, and Amy - you're babes! (quite literally too, they're gorgeous!)


The first new recipe we tried was sugar cookies with chocolate and crushed peppermint. My favorite part about this is the new sugar cookie recipe I found while searching for this cookie (that I was introduced to by a good friend in school. (Thanks Kristi!)


You can find the awesome new sugar cookie recipe here: Delicious Sugar Cookies

Tips: Cream butter and sugar while the butter is cold. I used a thin vase to cut out 1 1/2 - 2 inch circles for this recipe. (You'll see why this is important tomorrow!) The chocolate used in this recipe is just chocolate chips, so it's not tempered and needs to be kept in the freezer/fridge. If I did it again, I might just use the sugar cookies on their own with festive sugar crystals on the top. This recipe does NOT need frosting. It is delicious without!

If you want the chocolate peppermint version, here it is: Chocolate frosting and filling recipes

For this next dessert, there is no real recipe needed. If you've never had them, you must try them. This is one of my all time new favorite Christmas goodies. (Introduced to me by my used-to-be neighbor Jill Morris - who is not there to make them for me this year, so I'm doing it myself - miss you girl!)

Recipe (sort of): Make peanut butter Ritz sandwiches by smearing some peanut butter in between two Ritz crackers. Dip them in chocolate candy coating. Chocolate almond bark worked well. Make sure you don't use chocolate chips - they won't set at room temp. Drizzle with almond bark (white). Let set. Done!

I'm very excited about these next ones too. Caramel chocolate covered pretzels are the ones I really wanted to get the hang of this year. This is an AWESOME recipe!

Caramel Chocolate Covered Pretzels

Hints/Tips: Do not cook caramel to soft ball stage. It will be too hard...it will stick to wax paper without any kind of successful chance of being removed (unless you like a mouthful of paper)...but it will make delicious caramels! So, when she says boil for five minutes, she means five minutes! When you dip them, do not place directly on the wax paper. Prop up on the cookie sheet so that you will have less to mold (which can get sticky). Don't mold the caramel at room temperature...you'll get sticky. Have I mentioned it's sticky? Make sure it's been in the fridge for a while first.

Also, make sure you use chocolate almond bark or Wilton's candy coating, etc. Don't underestimate the power of tempered chocolate! You will be SO happy with these pretzels! I know I am!!!

P.S. Stay tuned for tomorrow or Tuesday, as you will need something to put the cookies in! :)

Friday, December 18, 2009

Christmas Candy and Boxes (Free SVG)

My sister-in-law Jenny and "her people" came over this week and we made chocolates to give away to people. I love that we do this every year! We had so much fun and J.J. and Ryan loved having them over. It was fun seeing them play together.

Jenny made the Rice Krispies Treats that we dipped in chocolate and sprinkles. She also made delicious fudge that we cut shapes out of (recipe on back of marshmallow creme jar). If you want the recipe for the other chocolates (you won't regret trying them out - they're SO delicious!), here they are:


And of course...here's the file for the boxes we made. It's basically like a larger pastry box. Very simple design (cuz that's what I had time for!) If you size it as large as it will go on a 12 x 12 paper, you will get a box that fits eight mini baking cups just perfectly!

Free SVG

Tuesday, December 8, 2009

Nativity

Thanks everyone who has put up a link so far...for those who haven't, you have until the 20th if you're still working on projects!

Lately I've felt a huge crunch as finals approach (along with all the projects, presentations, and papers due at the end of a semester), so I haven't had a whole lot of time to work on new things. However, there is this one file that I created after I saw a picture of a cute nativity. I basically just manipulated shapes in inkscape to create this and I thought it would make a gorgeous nativity in wood or metal (like the picture I saw). Hope someone can use it...wish I could!!

File:
Nativity Scene - .svg

Tuesday, November 24, 2009

Decorating for Christmas...ALREADY!

Well, I've got little kid decorations for Christmas, but I don't really have much in the way of adult decorations. I've wanted the cone trees for years, but I didn't want to pay $30 for one (and of course I wanted two). I also wanted some glittery balls I found at Roberts last year, but it was $12 for one color. Yikes! When Christmas was over, I bought them for $3 for one color. Much better.


I originally had them in this hurricane holder...but I felt I needed to change it up. When I saw Just A Girl had bought some styrofoam cones and decorated them with yarn, I thought,

"I can DO THIS!"

So, I bought the styrofoam cones (I used a 50% off on one, cuz I'm super cheap like that) and I got to work.

I painted the cone the color of my first box of glittery balls. I even had some help from the kiddos!
Then I hot glued the balls on starting from the bottom in rows.
Then I cut out a piece of felt the color of my balls, using a 4" diameter circle that I cut from my cricut. :) I use that machine for EVERYTHING.
And here's the result. I love them and I'm now super excited to finish that little area. I think pine cones are in order...and who knows what else...maybe a vinyl sign?

Sunday, October 25, 2009

Freebie Cut File - Week #24

My weeks are going by fast aren't they? I'm trying to get caught up with all the box files I had people cut out for me! I hope you guys are as excited as I am about boxes, cuz that's where we've been and that's where we're gonna keep going for at least a little while longer! This file was requested by Gail...and I'm glad she did!


This first one was designed by Dawn at http://dawnday.blogspot.com. She also did the chocolate box you saw before. When I first saw this as a pdf, I thought it would be so cute to have patterned paper for his little "outfit". It turned out darling! And thanks to Dawn too for the tip on fixing the svg so it cut out right!

This second one was designed by Celeste at http://scrappingbutterflymom.blogspot.com . She's the same lady who designed the cute book box earlier. I love seeing how different people interpret these boxes! I thought she did a great job with changing up the face...giving him a mouth, a cute red nose, and changing up the eyes!
So fun ladies!!! Thanks again!
Here's the file:
P.S. There was someone who left a comment about not being able to open my files in scal. I can't find it now cuz I have no idea which post she left it under...but here's the answer! You have to open scal first. Then you can either go to file, open or file, import svg depending on what you downloaded. Then just browse until you find where you downloaded it on your computer. If this doesn't help, please leave a comment again (I promise I won't lose it this time!).

Monday, September 28, 2009

Last Creative Cuts and More Project plus files!

Wow is this gonna be a long post. I decided for one of my projects I wanted to do a card portfolio for Christmas. I think I underestimated the amount of work it was going to take...but it's done! And once again...I love the paper they use at Creative Cuts and More. They're all basically in the Stardream series...shimmery fun!


This is the Card Portfolio in Gold Stardream with Hinge #04 in Antique Gold Stardream. I also used a Label #1 I got from another internet site...but I have no idea where it came from! Sorry. I used ALS Script for the Noel vinyl lettering.


This card is the A2 Circle Window Card #03 in Jupiter Stardream. I embossed with my cuttlebug and made a file for this Christmas tree that I found as a clip art on the internet. I thought it was whimsical and fun for this card!
Here's the file for it:

This is the A2 Pop Up Insert Card Horizontal 2 Bars in Antique Gold Stardream. The writing on the front is Birmingham for the believe and CK Bella for in the magic of Christmas.
Here are the other files:
This is the A2 Twist Card in Malachite Stardream. I just used stamps and ribbon. All the stamps have been embossed. I also used a buckle from the set I got for the Fry Box in one of the previous posts...I just painted it white with acrylic paint!

This is the Tag Pocket Card in Jupiter Stardream with Gold Stardream tag and Citrine Stardream layer. I didn't like the color of the Citrine with this card, so I used it as a tag instead! It's the candy cane one in the first picture. I also used my children's glitter glue for the little dots on the bottom and top of the red part of the card. Shhh...don't tell!

These cute little tags are the Tag #04 set. I got it in Caramel Curious Metallics and in Bronze Stardream with Gold Stardream layer. These were so easy with some die cuts I already had and rubons I forgot I had!
This was a really fun project...and now I'm that much closer to getting Christmas done! I really want to make a fun box to put homemade chocolates in for neighbors and friends...and the Santa box Gail suggested! Too fun! Stay tuned all...and don't forget to go see what Creative Cuts and More has for you. So many cute cuts!