Free svg and scut files

Find boxes, cards, vinyl, and altered projects as well as the files you need to make them!

Cooking and Cake Decorating

From fancy occasions to easy weeknight to birthday and party food - find ideas for all your occasions.

Various Other Crafts

Repurposing, crocheting, knitting, sewing, floral, and other decorating.

Sunday, December 21, 2014

Yet another use for the mini cupcake box - Christmas cake pops!

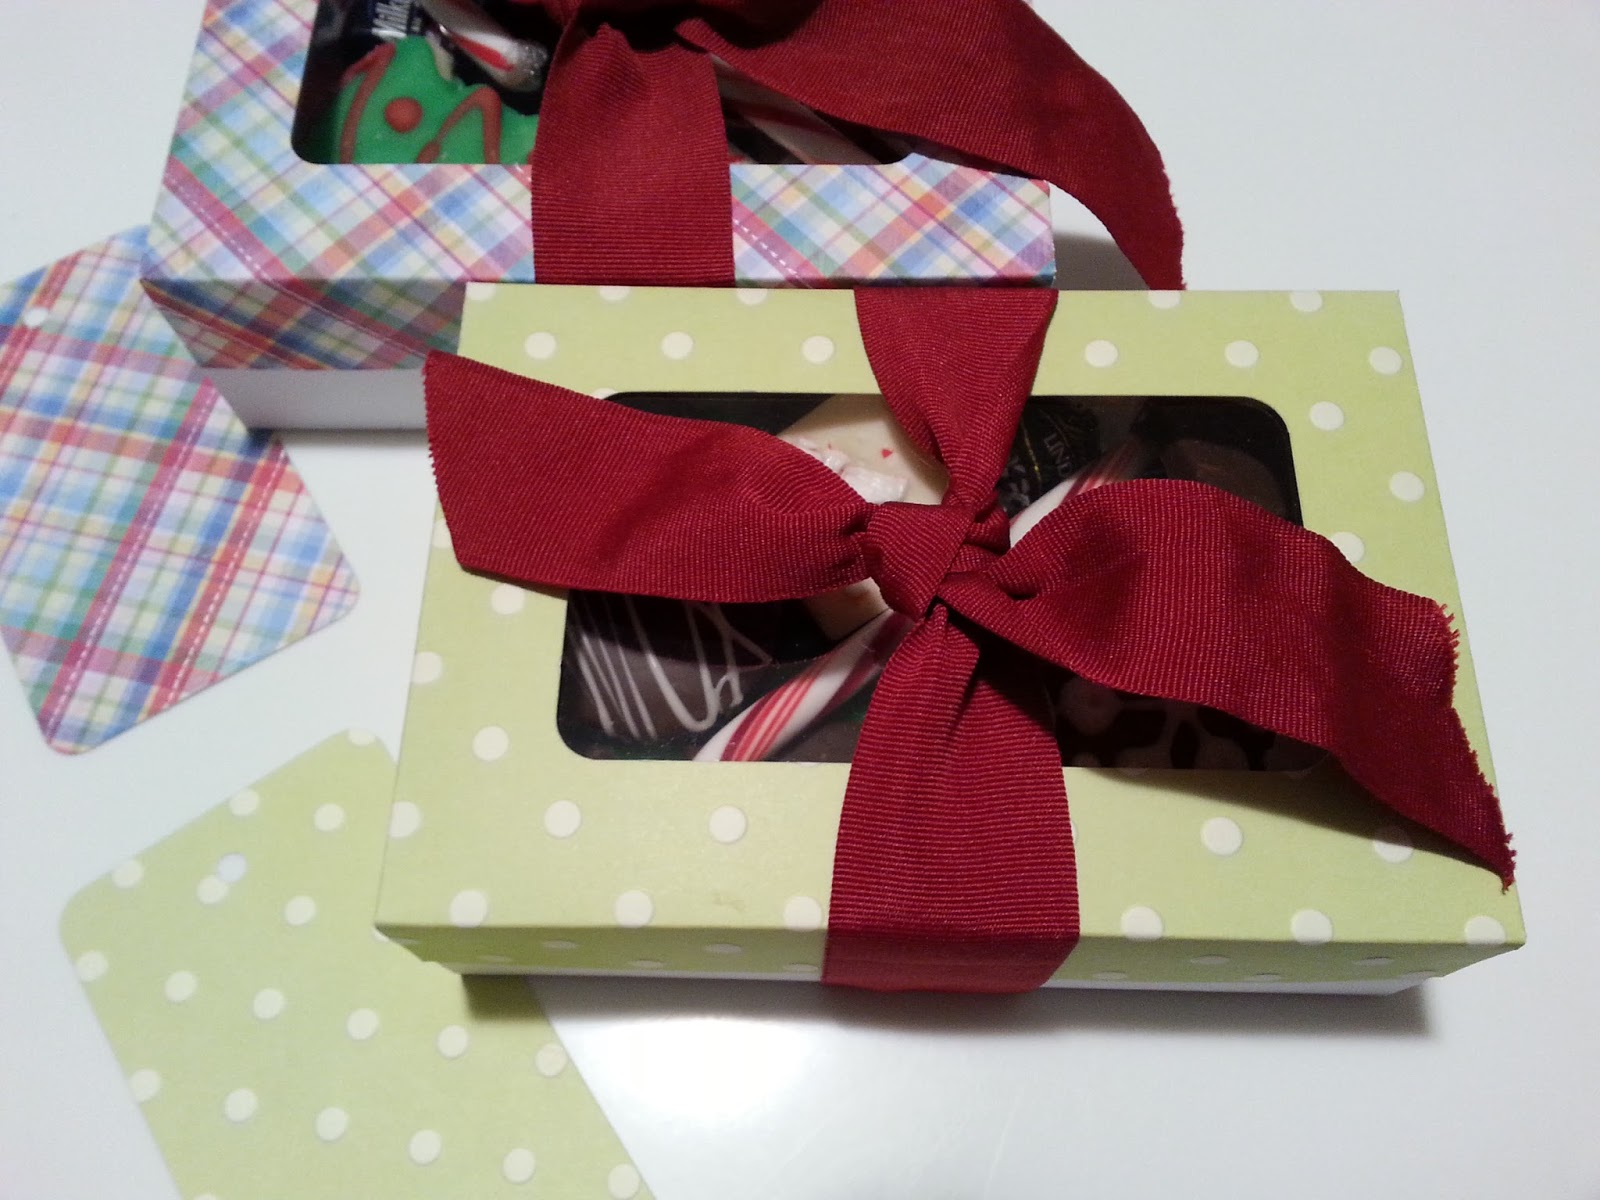
Hey all! As promised here is another way to gift the mini cupcake box from the previous post. Here, I just used acetate for the top and some fun paper for the bottom,


filled with cake pops, 


wrapped with a bow, and done! 


Well, except for the cake part pop. That took a little more effort. :)

The candy cane cake pop was super easy, and is my favorite to eat...

The hot cocoa cake pop was another fun one. 
(just make the mug handle and marshmallows out of white candy melts)


And are those lumps of coal? I worried about giving these away because 
of what it might suggest to those I gave it to...


The snowman was just a white cake pop with edible marker drawn on.

Pretty fun to make and give away.

In case you didn't get the file last time, here is the version without the opening at the top. I've also included a wrap to go around the box in case you want to use that instead of a ribbon.


Merry Christmas!!!

Sunday, December 14, 2014

Christmas box file plus reindeer card


I finally found some time to put together some goodies for Christmas and wanted to share. I know I said I wasn't planning on getting a new cricut any time soon...but with the Explore, I found that I could not only use all the files I had previously made, but I could also use the score tool or a pen at the same time as cutting. Oh, man...I haven't been so excited about a piece of equipment for a very long time. And when hubby found out that it can cut more precisely at smaller sizes, he actually thought it might be a good investment (for those following my husband's interests, he is making a San Diego lego temple and he wanted me to cut vinyl in very small letters to put on his legos). 


So...long story short, I'm getting an Explore for Christmas!!! And I'm using it before the big day. :) I have quite a few box files that needed a little update with score lines and writing, so as I use them again, I will update them. This time around, I am using the mini cupcake box without the insert. The link for the svg with score lines is below.


I also have another use for these...which I will show you in another day or two. These are exciting times for me! Baking and crafting are passions of mine and I haven't had much time to do either during the last few years. Hope you can use these ideas and enjoy it as much as I have!


Mini cupcake box without insert (with score lines) - .svg

Reindeer card - .svg (Yes, I got the idea for this from the cricut design space website)
Happy Holiday words - .svg

Wednesday, November 12, 2014

Cake Pop Box SVG (5-6) New file online

Once again I have to apologize for my tardiness in answering some comments. I've learned that many people want to access the Cake Pop Box svg but the stinking 4shared account prevented people from getting it. I have updated the link to a MediaFire link and have provided it here too for all those who want it.


Saturday, June 21, 2014

Stenciled chocolate wrap black forest cake

I do NOT own a cricut cake machine. I got my expression years ago with SCAL and do not intend to buy anything else for years to come. So, I don't explore much with fondant plus cricut. However, that doesn't mean you can't use the regular cricut for cakes. I recently learned a new technique called chocolate wrapping. There is an excellent tutorial here: Julia Usher Stenciled Chocolate Cake Wraps

She uses a beautiful stencil for her cake. I was inspired to try this because she made it look so easy. And actually, it wasn't so bad! And you can make your own stencils! Give this technique a try...everyone will be so impressed! This is particularly good for those of you who don't know how to pipe.

I needed to make a cake for a friend from church whose husband was finishing his internship at a physical therapy clinic. She wanted the logo for the company on the cake that said thank you. Besides that, she gave me free reign. I thought having the logo on the top with "Thank You" would look tacky. Enter new technique.


I loved the way it turned out. That being said, I could have used better white chocolate, but I used what I had on hand. I used Hershey's special dark chocolate chips for the rest of the chocolate wrap, and it was delicious! I also used a new mousse recipe I found online (mousse recipe here) for the middle and italian meringue buttercream for the frosting (delicious recipe here and tutorial here). The chocolate cake recipe is a doctored cake mix (found here). Cherry pie filling went on top. I love black forest cakes. Particularly with some type of dark chocolate ganache or the chocolate wrap here. It is decadent and fancy - perfect for parties where you want to impress.


So, how did I use the cricut? I created a .svg with the logo repeated on acetate for the length I needed and another stencil for the Thank You!. Then I cut more acetate the exact size I wanted for the height with a little extra to go around, per Julia's instructions. I layered the acetate stencil over the acetate base and applied melted white chocolate. After it hardened in the fridge, I added my dark chocolate over the white and put in the fridge until not liquid, but still flexible. Then I wrapped the cake with the acetate and put back in the fridge to harden completely overnight. The next day, I took off the acetate and cut off the excess chocolate in the back. And here's the result!


I bought my acetate online at Amazon.com. You can find the kind I bought here. I know it's not food acetate, but I'm not selling my cakes and I just washed it to make sure it was ok. I also use the acetate for other things (boxes really), so I had this on hand. I might look into food acetate if I do this technique enough...and some great stencils.

Hope you give this a try! I'm so glad I did.

Friday, June 20, 2014

Hey all!

Yes, I've been MIA for a while. Sorry!

I've been getting a few comments regarding how to download my files. I really want for people to be able to access them (for free!), but it appears that 4shared is now a horrible and ridiculous way to file share. I'm not sure why that is, but I am now in process of transferring my files to MediaFire in hopes that this will be a better way to share with you.

I don't have time to individually go through right now and switch each blog posts' links to the new ones, so I'm providing links here to the boxes and other svgs so that you can access them fairly easily. I hope this helps!

Boxes on MediaFire:: Boxes
Other SVGs on MediaFire: 2D SVGs
Other file types on MediaFire: Other Files

Wednesday, December 4, 2013

Winner of the Experiment

The results for my online experiment are in! The winner of the Amazon gift card is:

454188

To claim your prize, please email fordexperiment@gmail.com where a 3rd party will verify your confirmation number (hopefully you saved a screenshot, but if not, email anyway and we'll figure out a way to verify) and will send you (via email) the gift card!

Thanks again to all who participated! 

Have a great night!

Melinda

Monday, November 25, 2013

Chance to win a $30.00 Amazon gift card!

Hi everybody!

I have an online experiment for my PhD program and I need to get responses! It will only take about five minutes. You will receive instructions regarding the gift card at the link below. Thanks so much in advance for taking the time to participate! My followers rock!

When I have enough participants, I will close the survey and take off this link. I will shortly thereafter announce the winner of the gift card!

Happy Holidays!!!


UPDATE: 11/28/13
Thanks to all who participated! The link is now closed and I will announce the winner of the gift card within a few days. Happy Thanksgiving!

Monday, October 28, 2013

Dinosaur Hat Crochet Pattern (Free!)

My little 3-year-old was adamant about being a dinosaur this Halloween, only we didn't have a costume and we didn't want to go buy one. For our ward trunk or treat party, we put some spikes on a green jacket and called it good, but I felt bad that he had such a sorry costume to wear. 
Well, over the weekend, he wasn't feeling so good and on Sunday I ended up having to stay home with the little sicky-poo, so I decided I would crochet him up a little hat to wear while we snuggled on the couch. (We found out today he had two ear infections! Poor little guy!) Here he is with his new dino spike hat - all ready for Halloween!

This was a quick project. I've included the instructions below in case anyone else needs a last minute Halloween costume as well. This hat fits 2-4 year olds well.

Materials:
Two colors yarn (you don't need much)
J Hook
Darning Needle
And scissors o'course!

Hat
Round 1: 12 HDC in magic circle (12)
Round 2: 1 HDC, 2 HDC in same stitch, repeat through round (18)
Round 3: 1 HDC, 1 HDC, 2 HDC in same stitch, repeat through round (24)
change color
Round 4: 1 HDC in next 3 stitches, 2 HDC in same stitch, repeat through round (30)
Round 5: 1 HDC in next 4 stitches, 2 HDC in same stitch, repeat through round (36)
Round 6: 1 HDC in next 5 stitches, 2HDC in same stitch, repeat through round (42)
change color
Round 7: 1 HDC in next 20 stitches, 2 HDC in same stitch, repeat (44)
Round 8: 1 HDC in each stitch (44)
Rounds 9-18: Repeat round 8 (44) making sure to change color after every third round.
SC around the hat in desired color. (Whoops, still need to do that - not in pic!)
Fasten off

Scales
Round 1: 3 SC in magic circle (3)
Round 2: 1 SC in next 2 stitches, 2 SC in next stitch (4)
Round 3: 1 SC, 2 SC in next stitch, repeat x 1 (6)
Round 4: 1 SC, 2 SC in next stitch, repeat x 2  (9)
Round 5: 1 SC in next 2 stitches, 2 SC in next stitch, repeat x 2 (12)
Round 6: 1 SC in next 3 stitches, 2 SC in next stitch, repeat x 2 (15)
Round 7: 1 SC in next 4 stitches, 2 SC in next stitch, repeat x 2 (18)
Round 8: 1 SC in next 5 stitches, 2 SC in next stitch, repeat x 2 (21)
Rounds 9 – 10: 1 SC in each stitch (21)
Fasten off and leave tail for sewing on to hat. Make two of each color.

Starting at the back of the hat (where the color change is), join one of the scales using your preferred method (I just use a darning needle and slip stitch). Alternate colors and join the rest of the scales in a similar fashion.

Once complete, take lots of pictures, cuz you're gonna love the way it looks on your little one!

Thursday, October 10, 2013

Free svg - thank you!!!

Happy Fall everyone!!!

***UPDATE***
I've gotten some feedback that:
1. the requirements are too high to get this file, and
2. people don't want to send out email addresses.

Both of which I completely understand!
Apologies for those of you who have already jumped through so many hoops! You are stellar!!!

I'm changing my approach, because I never wanted to make my blog be "work" for others...the whole point of sharing my svg's is to aid you in your quest for new and fun ways to give!
So see below to find out how much easier you can give this box away to friends and family!

***END OF UPDATE***

Tis the season to be thankful…and I’m thankful for you! 
Yes, YOU! 
You fellow bloggers and crafters, commenters and laughterers. J


 I know I’m not around much anymore and I don’t have a ton of time to create new stuff to share, but I appreciate that I have so many followers and visitors given the amount I blog these days. 


I also really, REALLY appreciate all the nice comments that make me feel good about sharing my work. I think your comments are what really keep me motivated to post what I make.


So, as a token of my appreciation for your comments, I have made this svg for YOU. 


Thanks again to all of you for taking the time to view and comment on my little  and very humble blog! My very best to all of you this season!


If you want to download, please do...the link is below...just leave a little comment for me so I can get enjoyment out of knowing I helped someone out! 

Friday, August 23, 2013

Cake Pop Stand and Salted Caramel and Chocolate Cake Pops

Well, time is flying by for us. I can't believe I'm going on semester four out of five! Wahoo!!! Before school starts though, we have an accounting party tomorrow for the faculty and PhD students and their families. It's a potluck and I gave them the option of honey lime chicken enchiladas or cake pops. Guess what they picked? :)

 My hubby made me this beautiful cake pop stand out of Corian. I LOVE IT!!! Can you say nonporous, sturdy, easy to clean, elegant, and perfect? (not to mention heavy) He will also be making me some that will hold cake pops as I decorate them. This one is for transportation and display. We thought about selling this little beauty, but it is rather heavy, and would probably be fairly expensive as Corian is expensive...but for the serious cake popper, this is awesome!!! I'm still contemplating whether I want an ogee edging, handles, and possibly putting on some vinyl for beautification (not that it needs it - love it Jar!). Anybody know the market for something like this?
 On another note...I got an awesome salted caramel frosting recipe I found on pinterest that you can find here. It is heavenly in a chocolate cake pop with a little of the extra salted caramel, drizzled chocolate, and toasted almonds on top! It's my new absolute favorite cake pop combination. And though the frosting is probably too thin for decorating a cake with anything but a layer of frosting, it was perfect for these little concoctions. The cake pop held together beautifully...much better than the chocolate with chocolate frosting ones I also did (which you can see below).
 I also decided to make red velvet with cream cheese frosting. I really enjoy these ones too. Very nice flavor...just not my fave since good old salted caramel frosting came around.

 And of course, I couldn't make cake pops and not create some little animals from them. I just can't resist!
 All of these little guys are chocolate with chocolate frosting. I figure the little kids will be happiest with that flavor combo (or lack of combo). The hedgehog eyes are just pearls. I wrote with edible marker on them with my markers that I LOVE! I bought them at least four months ago and used a number of times with great results. For the turtles, I mixed some various colors of melts (red, white, and chocolate) and dipped some pretzel stick pieces in it. Then after I covered the cake pop in green, I set it on top of four of the pretzels and then stuck in one more for the head while it was still wet.
 I got the cute little eyes for my birdies from a cake and candy store I have fallen in love with since we moved to Pittsburgh. It's called Sugar and Spice and it's located in West Mifflin. For as long as we're here, this will be my only candy supply store from now on! They carry Merck's chocolate (which kicks Wilton's backside any day of the week). On top of that, just about everything they sell is way cheaper than Michael's or even Wal-Mart. If you're in the area, check them out! We gotta keep local family owned, small businesses in business! Love the service too. Those gals know everything!

 The ladybug has junior mint heads and the rest is just edible marker again. Did I mention i love those?


I also decided to try a new technique out that I found a while back and thought looked fun. It's so easy! Wet on wet candy melts. This is by far the easiest way to decorate a cake pop that still looks awesome.

Whew, I'm cake popped out! Well, I'm done for another month and a half until the next birthday, anyway. Gotta come up with something new for a little two-year old. Hmmm......