This little card was cut out using the Eller font (another freebie on DaFont). Stamped with Provo Craft stamps, and run through the cuttle bug. Another fast one for saying a quick thanks!

 If you're looking for something way simple to do for a Star Wars invitation, this is it! It took me very little time (which, I'll admit, I opt for quite a bit). The font I used was Star Wars Kit. I also used a font called Forced Reentry for the inside of the card because they had great pictures of some Star Wars characters. They are both free fonts that you can find on DaFont? I believe. For the inside, I said this with the pictures.
 I wish I could remember who I got this basketball net design from so I could point you there. If anyone knows, it's a design studio creation and I got it last year so I could make this card for my two year-old's birthday.
 I got the idea for this from Regina Easter (see link on the side). I bought the DB Animal Occasion font from Scrapnfonts (I LOVE that site...perfect for cricuteers). This was very quick to make.

 Once again, my mom helped me with this centerpiece. We found the grass at Tai Pan Trading and then just wired and taped these little stems everywhere inside the pot. It was so easy and I loved the end result. If you look at the framed art hanging above the plant, you'll see that it's just paper inside of cheap wood frames that I painted. I love making stuff out of cheap and easy to find items!

 Have any old ugly furniture that you're replacing? Or do you want something that you can't afford? That was me. I really wanted a cabinet that would hold all my spices so that I could have easy access to them while cooking, but I couldn't spend a lot to get what I wanted. So, I took a couple trips to DI before I found this little number. Of course, at the time, it was a horrid brown color with nasty decor all over it and disgusting old knobs. But then, it only cost ten dollars!!! I took off the excess decor, knobs, and sanded the entire thing down. Then I painted it in dark green and let it dry. I did a second coat in the spots I knew would show. Then I painted the parts I wanted crackled in antique white and put on the crackle medium. I did this one side at a time to make sure the sides weren't too dry for the crackle. Then, I put on new knobs, and hung it up! Hooray, new spice cabinet for me!

 I love this! And don't think I'm bragging, even though I guess I technically am! My mom picked out these orchids and had the idea for putting all together in one box. I found the pot at Roberts, and then I called Rebecca at Artistic Blooms and begged her to help me! :) Luckily she was kind enough to walk me through this process. That girl is amazing. I was so scared of putting it in the wrong place and cutting the stems down, but she knew what she was doing. I get LOTS of comments on this as it's in my living room right smack in the middle. Everyone loves it! But not more than me! Thanks to my mom and Rebecca! A great centerpiece made pretty cheaply and in just my style.
 This is one of my husband's favorite recipes that I make. I smushed two recipes together to get the taste and the texture that I wanted. It's not deep fried, so it's way better for you than the Chinese take-out version...but it's also not crispy. It does have a lot of good taste though! Enjoy.
 This did take longer than I hoped it would the first time around, cuz I had to learn what to do, but the result was worth it. This was a very tasty and beautiful looking dish. Perfect for a brunch shower or just having company over for breakfast!
Scrambled Egg Brunch Bread
4 oz thinly sliced deli ham, julienned
4 oz cream cheese, softened
½ cup milk
8 eggs
¼ tsp salt
Dash of pepper
¼ c chopped sweet red pepper
2 Tbsp chopped green onion
1 tsp butter
½ c shredded cheddar cheese
In a mixing bowl, beat cream cheese and milk. Separate one egg; set egg white aside. Add the egg yolk, remaining eggs, salt, and pepper to cream cheese mixture; mix well. Add red pepper and onion.
In a large skillet, melt butter; add egg mixture. Cook and stir over medium heat just until set. Remove from the heat. Spoon scrambled eggs over ham. Sprinkle with cheese.

 Breads and pastries are probably my favorite recipes to make because they are so well loved by everyone who eats them. This is a particular favorite of mine because they are so soft.
Quick, Soft Breadsticks
1 cup warm water
3 Tbsp brown sugar
1 tsp salt
¼ cup oil
3 cups bread flour*
2 ½ tsp yeast

 Mmmm. This is a really good recipe and is so sophisticated looking to serve. It's make a really good appetizer for any type of shower or party really.
2 cups Parmesan cheese
10 oz box frozen spinach, thawed
14 oz can artichoke hearts, drained and chopped
2/3 cup sour cream
1 cup cream cheese, softened in microwave
1/3 cup mayonnaise
2 tsp garlic, minced
1 tsp lemon juice
Preheat oven to 375
Mix together Parmesan cheese, spinach, and artichoke hearts.
Combine remaining ingredients and mix with spinach mixture.
Bake for 20-30 minutes.
Serve with tortilla chips, crackers or sliced baguette bread.
 Holy cow! I think that says it all. I've been on a crusade lately to find the best french toast. Not because I like french toast so much; on the contrary, I'm not a big fan. But my dh LOVES this for breakfast, so I thought it would be nice to find a recipe that I didn't mind eating either. Well, this is definitely the winner. I have never had such good french toast...ever.
6 slices day old
4 eggs
2/3 c milk
1/3 c flour
1/3 c sugar
½ tsp vanilla extract
¼ tsp salt
1/8 tsp cinnamon
3 Tbsp butter
Confectioner’s sugar (optional)
 Mmmmmmmmm. This isn't really Red Robin, but you could probably guess that. This is a recipe I love to make for dinners. Red Robin's Teriyaki Chicken Burger is better than the homemade version, but it's close enough that we really enjoy this. For those of you who don't know, Jaren and I met while both working at Red Robin in Provo!
  I got the most fabulous recipe from my friend Rebecca. The recipe is here. I made this the other week (4 dozen) and froze what we didn't eat (2 dozen). Of course, we did have Jordan and Kelly's help in eating them and I gave 6 away to another family who had helped me out in Primary. But really, 18 rolls for about 5 people (my kids all together count as one)? That's ridiculous. So if you don't want to pig out on rolls, don't make these. I also ate them at random times by microwaving a frozen roll for about 25 seconds. And then did another...and another. I eat too much. Anyway, I hope you enjoy! (Oh, and if you don't want an almost dessert kind of roll, put butter on while it's hot instead of the milk and sugar glaze.)
 This isn't the best picture of the inside of the pie, but I thought I'd show what it looked like and how thick the sauce is inside.
 Here is the recipe:
 This was very delicious! You probably can't tell from the picture...I'm afraid I'm not so good at taking good food pics. :( I actually started eating this before I realized I needed a picture to put on here. I got this recipe from Rebecca's blog. Kind of a lot of work, but if you need to feed a lot of people, it's worth it. I made about twice the meat, twice the dressing, and one batch of rice. The amount of meat (3 1/2 lbs) was perfect for 10 people. I had WAY too much dressing, and I had leftover rice (that I froze and ate with enchiladas). Another time when I have the craving and extra time, I will definitely make this again! The dressing really tasted a whole lot like Cafe Rio.

This is a great recipe from a woman in my ward (Caryolyn Johnson for those of you who know her). When I got sick a few weeks ago, I made this for dinner, and then I ate it for breakfast and lunch for days in a row. It was the only thing that sounded good to me!
Chicken Noodle Soup
1 onion
1 cube butter
1 1/2 qts water
14 oz can chicken broth
1 chopped carrot
1 stalk celery chopped
1 potato chopped
1/2 chicken breast, cooked and cubed
1 can cream of chx
1 can evap milk
basil, salt, pepper, garlic salt, Mrs. Dash
2 c uncooked egg noodles
Sautee onion in butter. Add broth, water, vegetables, and seasoning. Cook about 20-30 min. Add noodles and chicken. Cook until noodles are done. Add milk and cream of chx. Stir and cook until mixed in.
 I've been wanting to do more food storage...so my next adventure is in canning! I went to a friends house last week and we did a bjillion (yes, that's totallly a word/number) cans of apple pie filling. I was so excited to do this! So I've done peaches and applie pie filling now. I'm going to be asking for a canner and the utensils for Christmas, so, Mom Ford, if you have those cans still...I know someone who might want them! (ME!) I just wish I had more time for these things. It's so fun, especially when you do it with friends.
Mix corn starch and sugar, then combine the rest of the ingredients and boil until filling gets dark, a little more translucent, and thickens. Keep very hot! As soon as the filling is done, put apple slices in hot quart cans to fill halfway. Then pour filling up to where apples end. Fill the rest of the jar with apples, stuffing to bottom of the part where the jar becomes the lid. Put more filling to same place. Burp the can by knife or by moving it side to side. Wipe the top of the can VERY well with a damp cloth. Put a boiled lid on and then twist into place. Put into canner with boiling water. Water should cover the tops of the lids. Cover canner with it's lid once all cans are inside and boil for 30 min. Do not start timer until the water is boiling. When done, put hot cans on a counter or table away from any drafts and place towel over them. Let cool for 24 hours. Test to make sure they sealed. This makes really good pies! And you can also put at the bottom of a 9x13 dish and pour yellow cake mix over the top for a really easy and yummy dessert or use in a cobbler!
 My sister and I made these together two years ago...has it really been that long Mindy? Just another fun little decoration for the holidays.


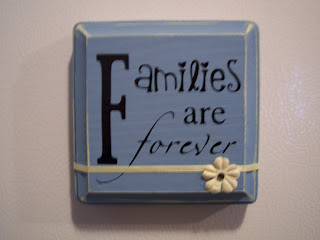
 I've had these vinyl sayings lying around for about 8 months and just didn't have time to get wood and paint it and get it all finished up. I've been dying to do some fun crafts now that school is out, so regardless of the time of year I decided it was time to finish these up! Course I'm not finished yet. I need to add three sets of eyes at the bottom left of the witch sign and then I need to figure out how I want to hang them up. Thanks Mindy for the cut file on this!
 This is Chase's first birthday cake that he got to mutilate. This was super fun to make, although I was up at 2:00 am trying to finish it Saturday night. I had to make way too many colors for this cake! This was a lot of work, but for those who have the right tips and know how to use them, this is definitely do-able!

 And of course, I had to make cupcakes to go along with the cake for others to eat. I mostly just used the round tips for all of these as well. Only the shark used one other kind of tip (the rose petal) for the fin. Good luck!
 Here's my Valentine goodies I sent to my mom, dad, and sister in the Philippines. Just an altered chocolate bar and some Hershey Kiss Roses. I had fun doing it!


 Over at Wonderfully Wordy, Jill found these really cute sayings for magnets that she had done. This is my rendition of the magnets.
 I made this card for Tyler's birthday too. I saw a really cute design on Paper Scissors Ink of a cupcake gift card holder and thought this would be fun to do. So I found free clipart and made it into a .svg, then manipulated it on scal to make it into a card. Then I got brave and freehanded some designs on the guitar to make it look more real. Here's the files for it if you want it!


